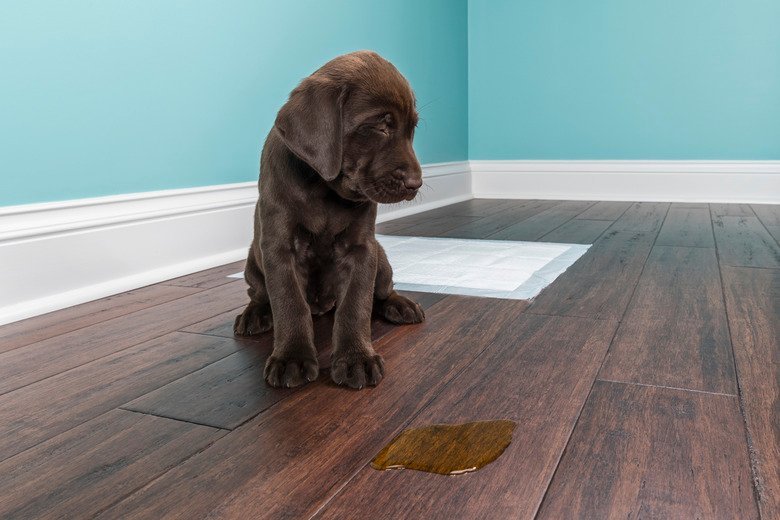
A concrete floor is a must-have in a city like Dubai. While this city prefers intricate luxury, the base has always been the leveled. Concrete provides a strength like no other. When polished, this flooring gives off a shine that can take down the tiles. A poorly leveled concrete floor can create many problems in the long run. The proper leveling and filling of these floors is required for surface excellence.
Most homeowners don’t keep their concrete floors finished & rustic because they don’t know anything about leveling the surface. This is where this amazing guide by Dubai Rubber is going to help you. Experts at this company have provided their secrets for a perfectly leveled concrete floor. We are going to discuss novel methods and techniques in detail.
A DIY Method + Required Tools To Level A Concrete Floor
Before we start any full-fledged process to level a concrete floor, gathering the tools is an important step. We have listed all the necessary tools and equipment that are required for the whole process, start to finish.
| Tools | Their Purpose |
| Broom Or Vacuum Cleaner | To remove dust and debris |
| Leveling Ruler | To check uneven spots |
| Measuring Tape | Measuring and determining the compound quantity |
| Protective Gear | To ensure safety while handling chemicals |
| Bucket & Mixing Paddle | Mixing the self-leveling compound |
| Drill (Paddle Attachment ) | To eliminate any lumps from the leveling compound |
| Primer And Roller | Apply primer. Ensure better adherence. |
| Trowel And Smoother | Spreading the leveling compound evenly. |
| Squeege Or Gauge Rake | Maintaining the uniform thickness of the compound |
| Spiked Roller | Eliminating air bubbles from the cement |
| Knee Pads | Protecting the knees while working on the floor |
| Floor Grinder | Smoothing out any high spots or rough areas |
| Moisture Barrier | Preventing moisture damage to the subfloor. |
| Edge Tape | To create expansion joints. |
How To Level A Concrete Floor With A Self-Leveling Compound
In the paragraphs below, you will find a detailed and comprehensive guide on leveling the concrete floor. For your better understanding, we have divided the whole process into 8 simple steps of leveling the concrete floor.
1. Inspect The Floor And Superficial Cleaning
The first and most important step is to inspect the floor. Clean the floor thoroughly by using a sweeper or a vacuum cleaner. Look for any mold growth or foul smell. Sometimes, the mold doesn’t show, but smells. Treat the floor with the best-suited anti-fungals and pesticides. This would prevent the mildew growth and moldy smells even further. Rid the floor of any loose debris and dirt.
2. Check For Any Imperfections (Highs And Lows)
Now that the floor is cleaned superficially, look for deeper imperfections. Look for any cracks that are bigger than a hairline and need to be filled. On the other hand, look for any high spots or rough areas. It is mandatory to even out the surface for a smoother application of the self-leveling compound. Sand the high spots and the bumps to even out the surface of the floor. Also, sand the rough areas to get rid of any type of highs and lows. Now, fill the cracks with the filler to prevent the cracks from getting too big.
3. Apply A Primer Coat To Seal The Subfloor
The floor is cleaned completely, and all the grooves and bumps are taken care of. Now, the floor needs to be sealed with a high-quality primer. Take the concrete primer and start applying it with a brush over the entire floor. This helps seal the porous surface, and the leveling compounds will adhere to the floor more strongly.
4. Prepare The Leveling Compound
The floor is prepared for the leveling compound to be poured on. Prepare the leveling compound in a bucket. First, read the instructions on the box by the manufacturer. Take a clean bucket and pour the compound powder into it. Mix it with clean water and mix the compound using a paddle. Use the paddle attachment with the drill. It would reduce your labour by half and give you a lump-free compound. Be careful to mix the leveling compound in small batches. This is mainly due to the quick-hardening nature of the leeling compound.
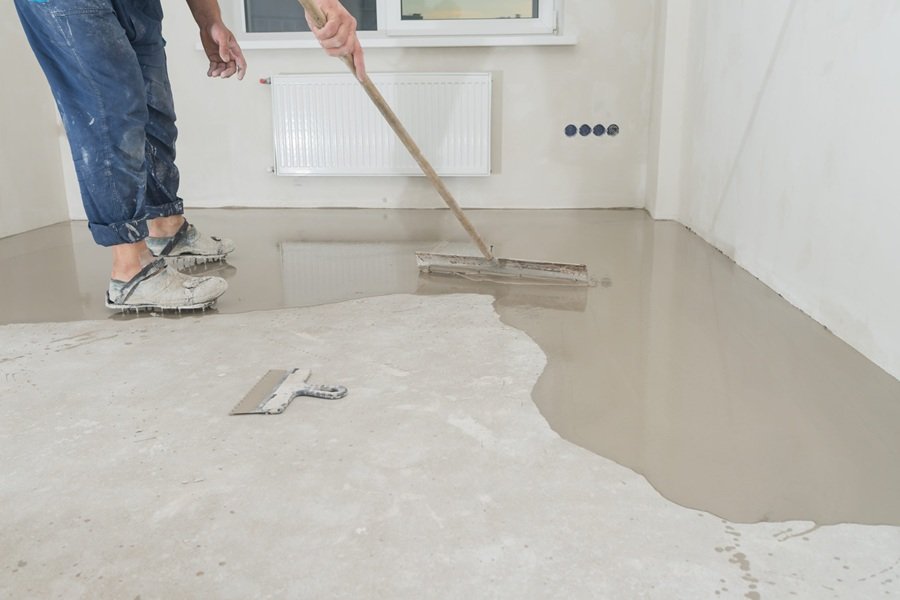
5. Pour And Spread The Leveling Mixture
Now your leveling compound is ready. Start pouring the mixture from one corner of the room. Always start from the right corner. The mixture would pour and level itself. But do guide the mixture towards the other areas with the help of a rake or a trowel. Work efficiently to prevent any accidents. Use a spiked roller to remove any air bubbles from the compound. Be sure to maintain a uniform thickness throughout the room. The standard thickness is ⅛ to an inch.
6. Allow Proper Curing Time
Letting the floor cure is crucial. If your floor faces foot traffic before it is cured, the floor will lose its touch. As we have talked earlier, the leveling compounds set quickly. This feature would allow you to have the light foot traffic on the floor just after 6 to 8 hours. Wait 24 to 48 hours to use the floor properly without hesitation. Without proper curing. The concrete floor would sink in with the slightest foot traffic.
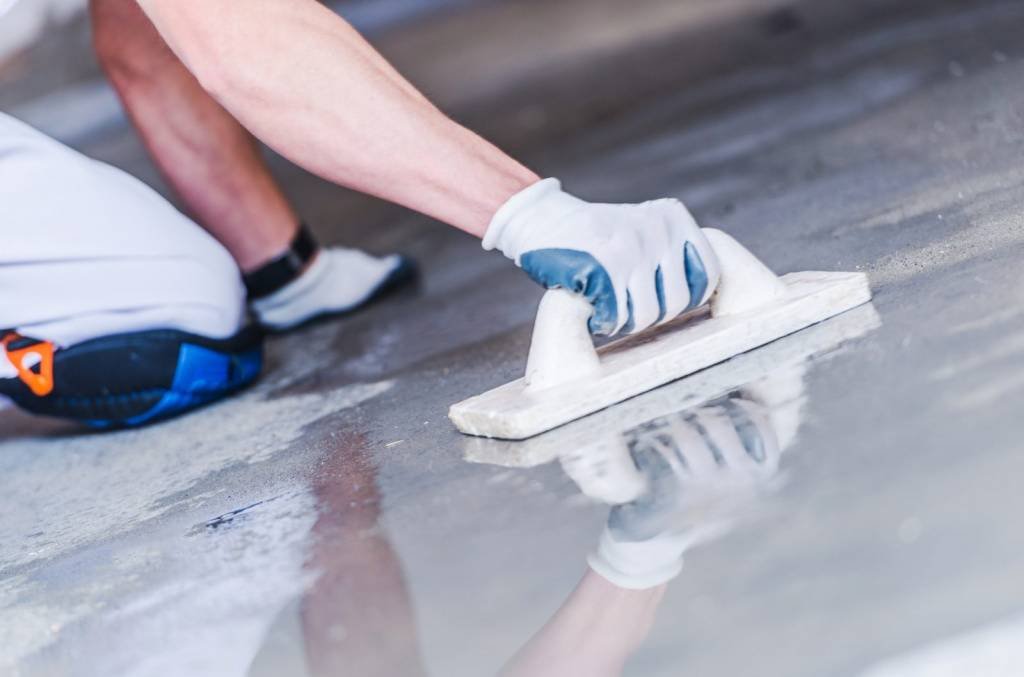
7. Clean And Polish The Floor
After the curing, the next step is to clean the floor thoroughly. After 2 days, your floors are fully cured. Sweep the floor once again and prepare for a thorough cleanup. Use a wet mop to get rid of any dirt on the floor. If you want a more polished look, use a concrete polish or sealant. Apply the polish in a thin layer with a brush or a roller. This polish would enhance the look of your concrete floor. Moreover, this would further seal the concrete floor and protect it from damage. Polishing the concrete is a very important and common practice in cities with higher humidity, like Dubai.
8. Final Inspection And Handing Over
Everything is done now. You have leveled a concrete floor all by yourself. Only one thing remains, and that is the final inspection. Inspect the floor carefully. Look for imperfections or any cracks that might’ve formed during the curing. Apply an anti-bacterial coating on the floor, and the floor is ready to use.
Maintaining A Concrete Floor — Dubai Specific Maintenance Tips
Now, let’s talk about the maintenance of this concrete floor. Maintaining a concrete floor in Dubai’s climate can bring many challenges. Below you will find a detailed list of maintenance tips that will benefit you.
- Dusting: Daily dust and dirt can settle on the floor. Dust off the floors daily to prevent the dust and debris from settling on the floor.
- Mild Cleaners: Don’t use harsh or abrasive chemicals to clean the concrete floor. These floors can get damaged by these chemicals.
- Re-seal The Floors: It is important to renew the sealing of these concrete floors annually. This would prevent any extensive damage to these floors.
- Avoid Water Pooling: Although concrete floors are durable, excessive water pooling on these floors can damage them. Water can damage the concrete seal, which is why prevent it from happening.
- Maintain Indoor Temperature: Extreme temperatures can damage the concrete floors. Extremely high temperatures can cause these floors to expand, while lower temperatures can easily shrink the floor and cause cracks in it.
The Summary — A Quick Recap!
We have discussed everything there is to know about concrete floor leveling. We know that concrete floors are the OG floors for cities like Dubai. We started our discussion with the essential tools and equipment. Later on, we discussed the 8 steps for leveling a concrete floor. We discussed each step in great detail and told you all about the precautions and methods. Lastly, we briefly discussed the mandatory maintenance tips from the experts.
Most Common Questions
1. How to level a concrete floor without a leveling compound?
There are two methods to level a concrete floor without a leveling compound. You can either just grind or sand the existing floor to make it smoother and shinier. The other method is to use an alternative material instead of a leveling compound. You can use plywood, shims, or even a mud bed to prepare a subfloor.
2. How to level a concrete floor for laminate?
Laminate can’t be installed on uneven floors. You need to level the floor beforehand. Take a measuring tape and measure whether the floor is leveled or not. Every 8 to 10 feet, grind all the high spots and fill out all the cracks with the concrete fillers. This would level your concrete floors for laying laminate tiles.
3. How to level a concrete floor for vinyl planks?
Level the floor completely — from start to finish. Sand any bumps on the floor and fill the ridges with concrete sealer. Pour the self-leveling compound on the floor and let it cure. This will adhere the vinyl flooring more strongly to the subfloor.
4. How to level a concrete floor that slopes?
Leveling sloped floors can be a bit tricky. Before pouring the self-leveling compound on the floor, prepare the subfloor accordingly. For example, while grinding the high spots, keep the grinder or the sander at an angle on which the slope is descending. This would level the subfloor evenly. Now, pour the compound carefully and in precise measurements. So that the compound doesn’t collect on the bottom of the slope.